Sensor Change
WARNING!
| • | Handle combustible and toxic gas sensors carefully, the electrochemical version is a sealed unit which contains a corrosive electrolyte. Leaked electrolyte can come into contact with skin, eyes, or clothes, and cause burns. If contact with the electrolyte does occur, immediately rinse the area with a large quantity of water. If contact with the eyes occurs, rinse thoroughly with water for 15 minutes and consult a doctor. |
| • | Do not install a leaking sensor in the sensing head assembly. The leaking sensor must be disposed of in accordance with local, state and federal laws. |
| • | Calibration is required after a sensor is installed; otherwise, the device will not perform as expected. |
Failure to follow these warnings can result in serious personal injury or death.
This section will provide a brief description on how to change the sensor in the ALTAIR io 4 Gas Detection Wearable.
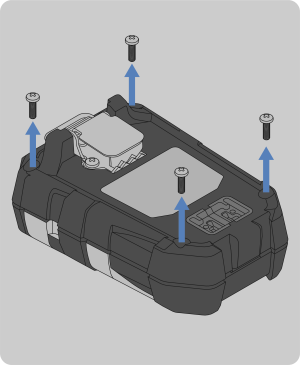
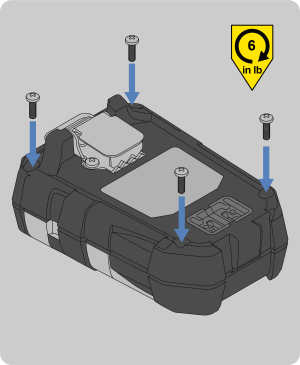
Tools Required:
| • | Phillips head #1 torque screwdriver |
|
|
|||||||||
|
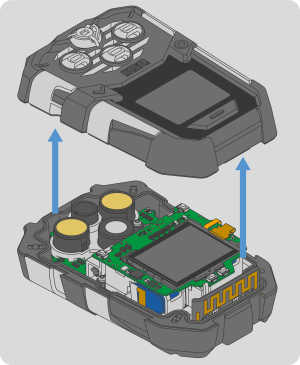
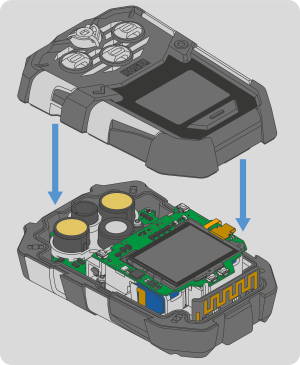
NOTE: The horn may stick to the gasket when the front housing is removed. If this occurs, see Step 4 of Horn Change to reinstall the horn.
|
|||||||||
|
|
|||||||||

|
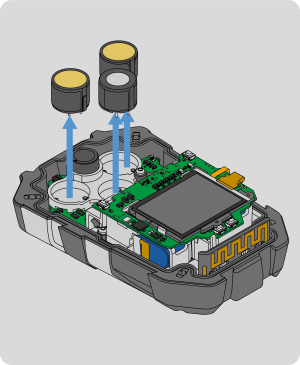
NOTE: Make sure to align the keying feature of the sensor with the keying slot in the clear bracket. Be careful not to break the sensor pins by forcing the sensor into the clear bracket. |
|||||||||
|
|
|||||||||
|
|